
Once you have routing paths and bundling habits — see cable management basics — the next question is hardware: cable management arms, trays, rings, and D-rings all organize cables differently, and each suits different service styles. Pick the wrong one and you fight your own infrastructure; pick the right one and maintenance gets quietly easier. This guide compares the options head to head.
Cable management arms
A cable management arm (CMA) is an articulated arm attached to a sliding-rail server: as you pull the server out for service, the arm unfolds and carries the cables with it — no unplugging required. It is the premium answer to the sliding-server problem, and in dense racks it is genuinely wonderful: full service access with zero cable disturbance.
The costs are real. Arms need rear depth — typically 150–250 mm of swing space behind the server, which your cabinet depth must accommodate (see rack depth explained). They add weight and mechanical complexity, they can bind if cables are dressed poorly, and they are specific to rail kits — not every server/rail combination offers one. In shallow cabinets, arms simply do not fit.
Verdict: the best solution for sliding-rail servers in deep cabinets where hot service access matters. Overkill for fixed-shelf gear and impossible in shallow racks.
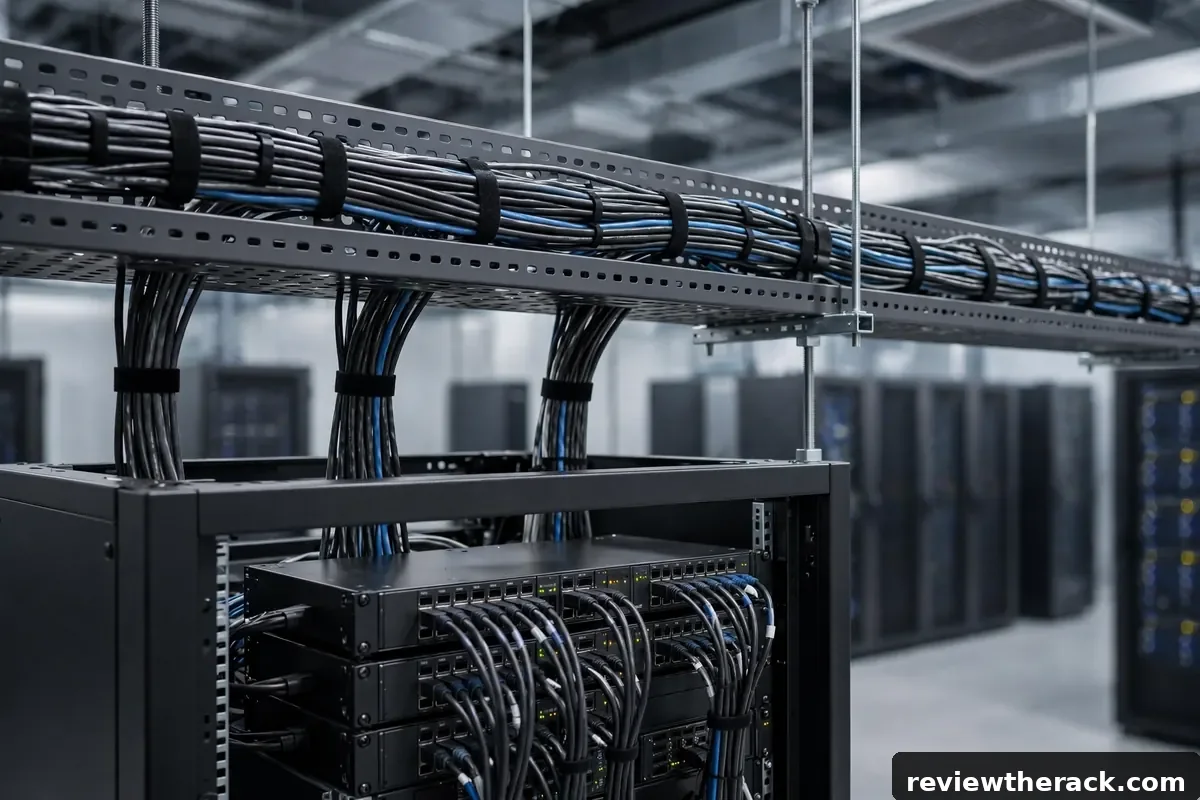
Cable trays: horizontal and vertical
Cable trays are open metal pathways — ladder, basket, or solid-bottom — that carry cable bundles between points. Overhead trays run above racks, carrying inter-rack and backbone cables off the floor and out of the airflow path: the professional answer for multi-rack rooms. Vertical trays (or troughs) run up the sides or rear of cabinets, organizing the vertical journey between U positions.
Trays excel at scale and change: laying a new cable in an existing tray takes seconds, and trays keep bundles off floors (trip hazards, vacuum cleaners, water) and out of airflow paths. They are the right answer when cable counts are high or churn is frequent.
The trade-offs: trays need space (overhead clearance, or rear/side room), they are more infrastructure to install, and an overfilled tray is just an expensive tangle — the 50% fill rule (never fill a tray more than half) exists because jammed trays are unserviceable. For a single small rack, trays are usually overkill; for two-plus racks or serious cable counts, they are the sane choice.
Rings and D-rings
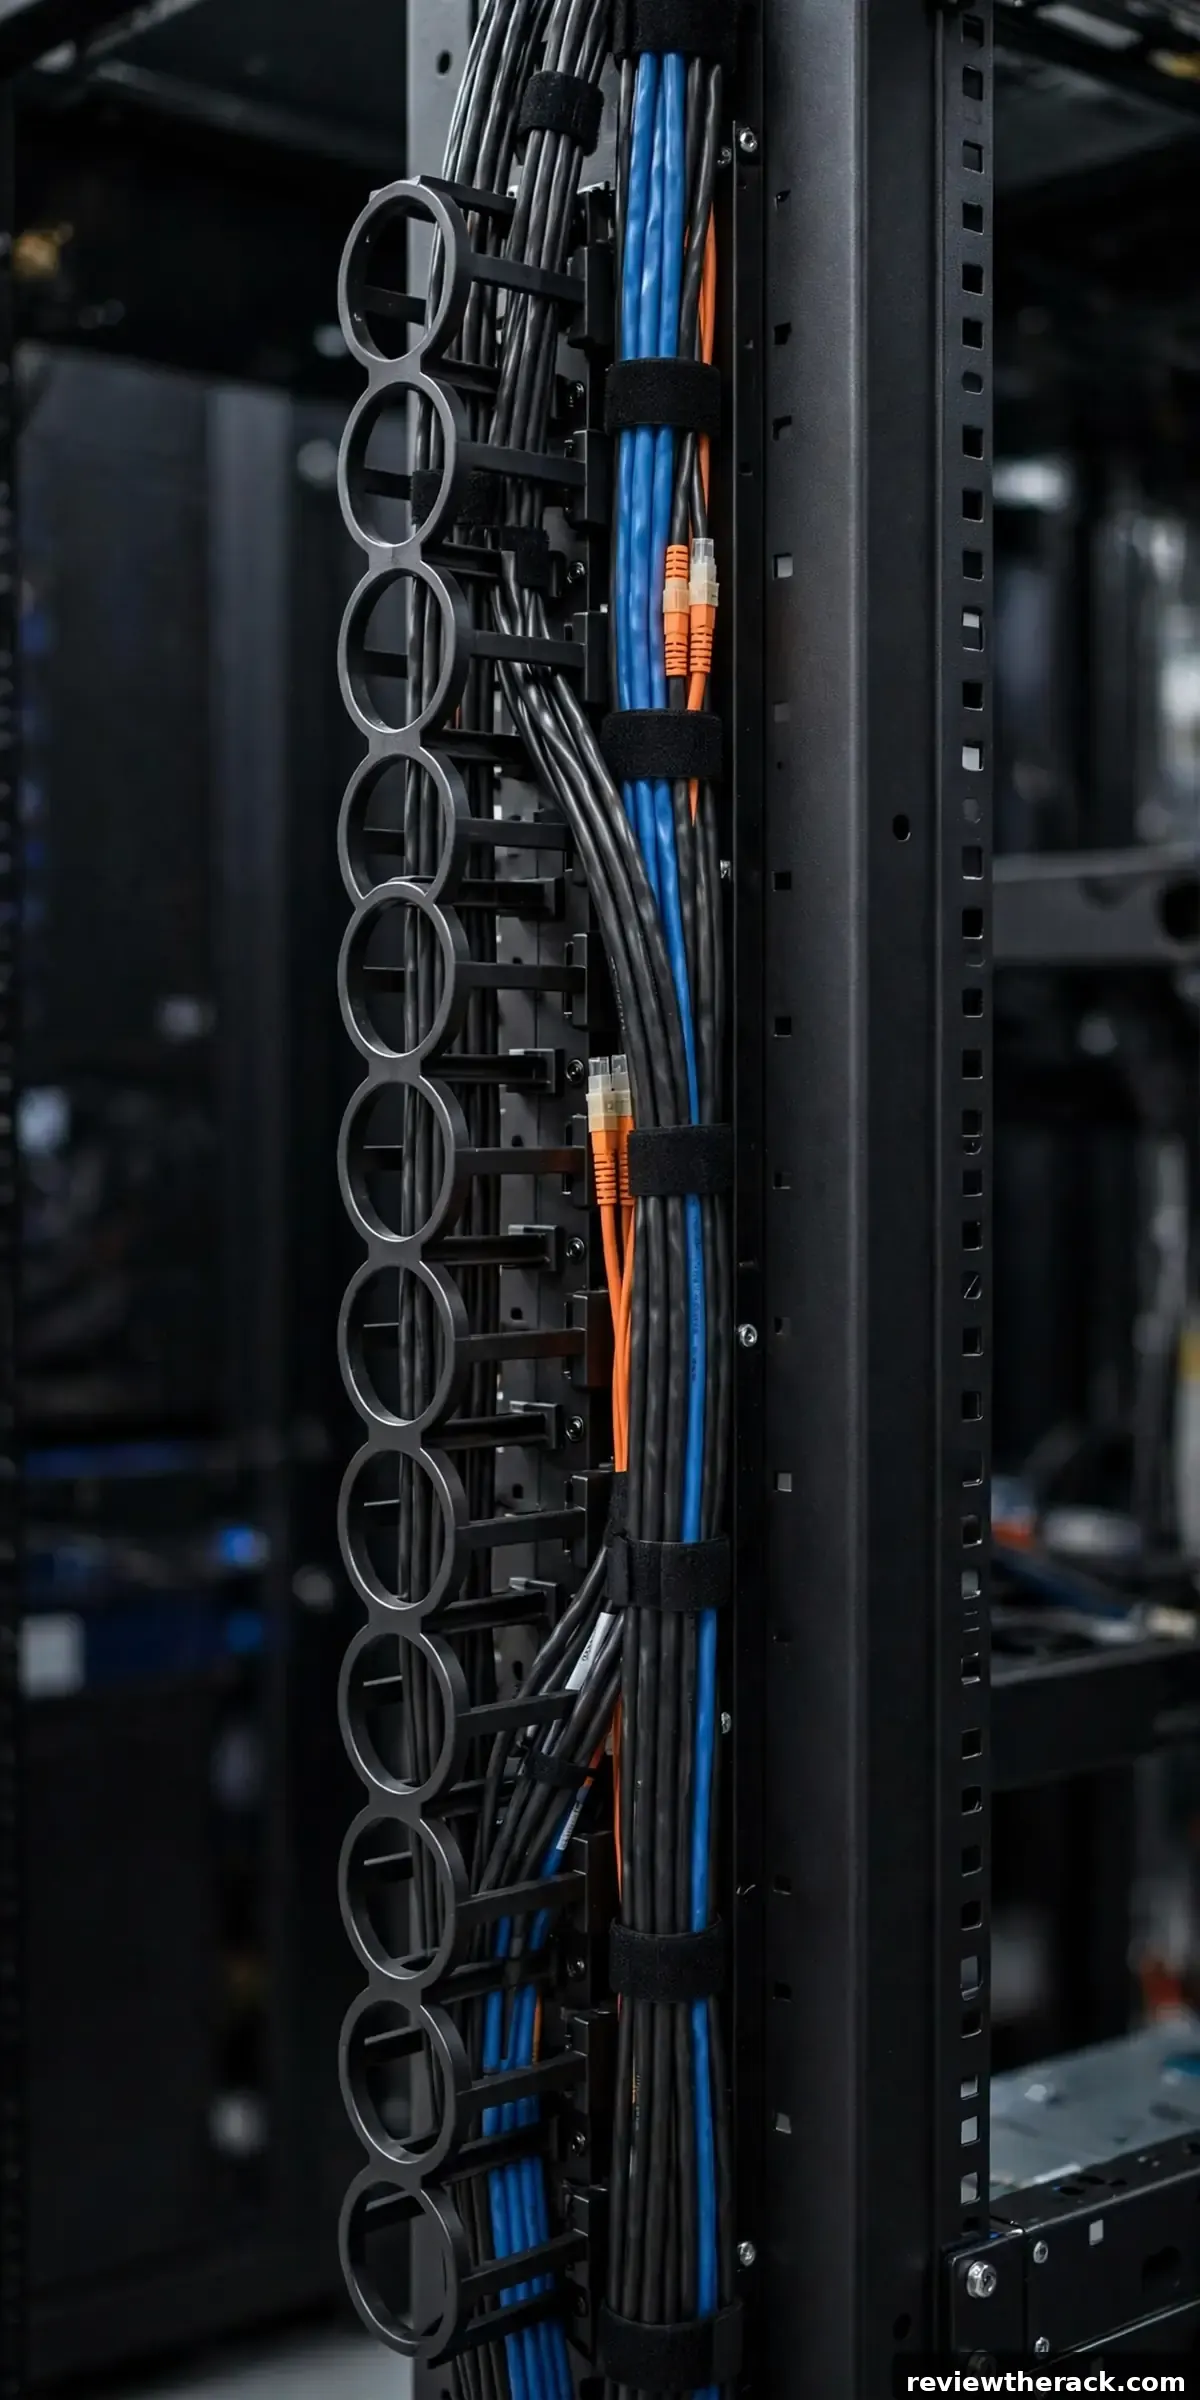
Cable rings (closed loops) and D-rings (open-sided, shaped like a D) mount on rack sides or managers and guide vertical cable runs. They are the simple, cheap, effective answer for organizing vertical bundles: cables pass through the rings, staying aligned and separated without the commitment of a full tray system.
D-rings’ open side is the feature — cables can be added or removed without threading, which makes them far more service-friendly than closed rings for changing installations. Use them generously along vertical managers: a column of D-rings every few U turns a floppy bundle into an orderly run.
Verdict: the default vertical organizer for small-to-medium racks. Cheap, simple, effective, and easy to retrofit. Pair with velcro (not zip ties) for the bundle itself.
Head to head: which for your rack
Single small rack, fixed gear: D-rings + horizontal managers + velcro. Simple, cheap, complete. Sliding-rail servers in a deep cabinet: add cable arms for the sliding units. Two or more racks, or heavy inter-rack cabling: overhead tray for the backbone runs, D-rings within each rack. Wall-mount or shallow cabinet: compact D-rings and short managers — arms and trays rarely fit.
High-churn installations (frequent adds/moves/changes) favor the most accessible options: D-rings over closed rings, trays over conduits, velcro over zip ties. Every choice should answer: “how annoying is the 50th change?” The hardware that makes change easy is the hardware that keeps the rack tidy for years.
The depth interaction nobody warns about
Routing hardware consumes the same depth your servers need. Cable arms need swing room, deep vertical managers need side space, rear trays need rear clearance. This is why depth planning — the full depth guide — must include routing hardware, not just the server chassis. A cabinet that fits your servers but not their cable arms is a cabinet that fits nothing usefully.
When specifying a cabinet, add the routing hardware to the depth budget explicitly: server depth + arm swing + cable slack + PDU depth (for vertical PDUs) = required mounting depth. Do this math before buying, not after the arms arrive.
Installing a cable arm without the headaches
Cable arms have a reputation for being fiddly, and the reputation is earned by poor dressing, not by the arms themselves. The installation sequence that works: mount the arm to the rail kit before loading cables (the arm’s brackets are designed for this order), then dress cables into it loosely — the arm articulates through its arc, and cables need room to shift within it. Bundle with velcro at the arm’s designated points, never with zip ties, and keep the bundle’s bend radius generous through the full range of motion.
Then test the swing: slide the server through its complete travel three times, watching the arm articulate. What you are checking: no cable tensions at full extension, no pinching at full retraction, no interference with neighboring devices or the cabinet door, and the arm returning to its rest position without manual help. Adjust velcro tension and cable routing until all three cycles are clean. An arm that passes this test disappears into the infrastructure; an arm that does not becomes the thing you curse every service. The thirty minutes of testing is the installation.
When to graduate from rings to trays
D-rings and managers handle remarkable cable counts — but every system has a graduation threshold. The signs you have crossed it: vertical managers so full you cannot add a cable without disturbing five, inter-rack runs draped across the floor or through doorways, and cable work that takes longer than the task it supports. When the organization system becomes the obstacle, it is time for trays.
Planning the tray run: map the backbone paths (rack to rack, rack to wall entry, rack to network core), choose ladder or basket tray sized for 50% fill at planned capacity (not today’s count — the tray should absorb two years of growth), and mount with proper supports and grounding. The migration itself is a project: schedule a window, move cables in groups with labels verified, and keep the old managers for in-rack distribution — trays replace the backbone, not the last meter. Done right, the tray turns cable work from excavation back into a five-minute task, which is the entire point.
Budget routing: the minimal effective kit
Routing hardware has a minimal effective kit — the smallest set that actually works, below which you are just improvising. For a single small rack: a 1U horizontal manager per switch/patch panel pair, D-rings down both vertical rails (a column every few U), a bag of velcro wraps (buy the roll, cut to length — cheaper and more flexible than pre-cut), and a label printer. That kit, well applied, handles the vast majority of small-rack cable management. Total cost: modest. Total effect: transformative.
What the minimal kit deliberately excludes: cable arms (only for sliding servers that need them), overhead trays (multi-rack scale), and exotic managers (solve specific problems you do not yet have). The upgrade path is demand-driven: when the D-rings are full, add a vertical manager; when inter-rack runs multiply, plan the tray; when a sliding server arrives, fit its arm. Buy the kit for the rack you have, upgrade for the rack you grow into — never the reverse. Restraint in hardware purchases is itself a cable management skill.
Routing for high-density racks
Density changes the routing math: at high cable counts, cross-section becomes the constraint — bundles get thick, managers fill, and airflow suffers. The high-density disciplines: more, smaller bundles (four slim velcroed bundles beat one fat one — easier to trace, cooler, more flexible), staggered breakouts (cables leave the bundle at different heights rather than all at once, keeping the bundle slim longer), and dedicated high-density managers (deeper vertical managers with more fingers, designed for the count).
And the density ceiling is real: when managers are full at 50% fill discipline, when you cannot add a cable without a maintenance window, the rack is telling you it has reached its cable capacity — which usually means it has reached its device capacity too. Respect the signal. The answer to a full rack is rarely denser packing; it is the second rack, the tray backbone, or the honest acknowledgment that growth needs infrastructure, not heroics.
Key takeaways
- Match the hardware to the service pattern: D-rings and managers for most small racks, arms for sliding servers, trays for multi-rack backbones.
- Include routing hardware in the depth budget — arms need swing room, and a cabinet that fits servers but not arms fits nothing usefully.
- Install arms with loose velcro dressing and test the full swing three times; the testing is the installation.
- When managers stay full and cable work takes longer than the task it supports, graduate to trays — 50% fill, planned for growth.
Frequently asked questions
Do I need cable arms for every server?
No — only for sliding-rail servers you service in place, in cabinets deep enough to accommodate the swing. Fixed-shelf gear does not need them.
Tray or D-rings for a homelab?
D-rings, almost always. Trays pay off at multi-rack scale; a homelab’s cable counts do not justify the infrastructure.
Can I retrofit routing hardware?
Mostly yes — D-rings, managers, and velcro retrofit easily. Cable arms need compatible rails and depth; overhead trays need mounting structure. Plan arms and trays early, retrofit the rest freely.
How full can a cable tray get?
Half. The 50% fill rule keeps trays serviceable — a jammed tray is worse than no tray, and blocked trays can impede airflow.
Related guides: depth planning with hardware included and keeping cable paths out of airflow.


